Showing posts with label Gourmet. Show all posts

Wednesday, April 6, 2011

Ginger Mint Lemonade

This recipe, (sorry there's no picture) is my favorite anytime beverage to make when we have company.  I pull out my fancy 1940's punch bowl to serve it in and it reminds me of my grandma Elee Hollins and how she'd have the entire family... about 20 of us over on Sunday afternoons after church for family Sunday "dinner" (which was really like an early supper at around 2pm).   There was almost always roast chicken, steamed rice, gravy, sweet dinner rolls fresh from the oven, either green beans or greens straight from grandma's garden, and a big punch bowl full of lemonade, made from fresh tart lemons, usually from a tree in the backyard, squeezed by hand.   Hers didn't have mint or fruit floating around in it, and she used regular granulated sugar.  Mine is an updated, organic, sparkling, and has a slightly herbaceous taste which goes well with all kinds of foods.   On a hot summer day, it's hard to resist and from what I've found, keeps party guests coming back to the punch bowl over and over and over.

This recipe yields about 12-16 servings depending on the glass size.  You can make the syrup ahead up to 4-5 days, and add the rest the day you'll serve it.  Multiplying the recipe works great too.  I usually triple or quadruple it at the syrup stage and lemon squeezing stage so that at parties I can quickly refill the punch bowl when it is inevitably empty. 

FOR THE GINGER SYRUP
1 cup of Water
2/3 cups of Evaporated Sugar Cane Juice, Turbinado, or Raw Sugar (or 1 cup of honey, maple, etc)
4 inch piece of fresh Ginger

Heat all 3 ingredients in a saucepan til boiling.  Reduce fire and simmer for about 10 minutes.  Cool completely.

FOR THE LEMONADE
1 recipe of Ginger Syrup (see above)
1 cup of fresh squeezed Lemon Juice
1 bunch of fresh Mint leaves
1 cup of Blueberries
5 cups of Sparkling Water
4 cups of plain Water

Mix syrup, lemon juice and waters in the punch bowl or other beverage vessel.
Break the mint into small sprigs and crush them in your palm to release the flavor.
Add mint and blueberries to the liquids and mix everything together.  Add ice and serve!!

Sparkling Peach Sangria


As spring arrives, I thought to myself, "Self, it's time to add some refreshing beverages to the readers' arsenals".   To start off, I'm sharing a super-easy recipe for Sparkling Peach Sangria because people are still talking about the batch I made last summer for an all ladies pool party I hosted at my house.  So, here it is, ladies! (and Gents...)  
You'll need the following ingredients to make 4 drinks, however you can feel free to add other types of fruit as well.  

2 Firm Ripe White Peaches
1 bunch of Green Grapes
2 Granny Smith Apples
1/2 cup Peach Schnapps
1/3 cup Superfine Sugar
3 cups chilled Rose' or White Zinfandel wine
2 cups Sparkling Water or Lemon-Lime Soda (such as 7-Up)
1 cup pineapple juice

Cut up peaches and apples into bite-sized chunks, add all fruit and sugar to the peach schnapps, mix and cover for at least a couple of hours, but ideally overnight.  When ready to serve, put schnapps mixture in pitcher or serving vessel and add wine, pineapple juice, and sparkling water or soda.  Mix well.
Serve over ice!  YUM!

Monday, March 14, 2011

Thai Spice Cupcakes


So, the second cupcake flavor we're planning for my sister's shower is a Thai Spice cupcake.  I wanted to make something unique that would go with the Thai menu theme... something more interesting that boring plain white or chocolate, and something that was more about the flavor than about doing something outrageous for the frosting decoration.  So far, I've settled on a Lemongrass Vanilla Cupcake (see "find it" section for recipe), and a this one which we did a test run of today and boy oh boy are these Thai Spice Cupcakes good!  The unexpected savory-sweet flavor profile of curry, mango, vanilla, mint, and jalapeno, upon first bite inspires a raised eyebrow, and an "oh wow!", the tangy mango curry filling sends you over the top and into a moment of ecstacy and the mango butter cream?  To diiiiie for.  Really.  You'll want to sit and savor this extraordinary treat for as long as you can stretch it out.  But enough of the foreplay, here's the recipe for making one dozen!  I suggest making the mango curd the day before so that it's already done and ready to use. 
Enjoy!

Cupcakes:

1 tablespoons curry powder
2 tablespoons minced jalapeno
1 tablespoon minced fresh mint
1 tablespoon minced fresh cilantro
1 cup finely diced mango
1 recipe Vanilla Bean Cupcakes (see "cupcakes" in the "find it" section to the right)

To Assemble:
2 cups Mango Curd (see Lemon Curd recipe with alternate instructions to make it Mango)

Frosting:
1 cup Mango Curd (see Lemon Curd recipe with alternate instructions to make it Mango)
1 recipe Vanilla Buttercream (American Style)


Make your Vanilla Bean Cupcake batter according to the recipe instructions then add the curry.
Fold in Jalapeno, mint, cilantro, and minced mango gently. 
Bake according to directions.  They will not be golden brown.  They're done when a toothpick comes out clean when inserted into the middle of a cupcake. 


Allow to cool completely. 
Make the mango curd.  
Make the Vanilla American Buttercream.  
Fold 1 cup of mango curd into the buttercream.  If it's too thin, you'll have to add more sifted powdered sugar until it's thick enough to hold shape when frosting your cupcakes.
When the cupcakes are cooled completely, push a finger down into each one leaving a hole.
Using a turkey baster, fill each hole with some of the remaining mango curd.
Then frost the cupcakes with the mango buttercream frosting.  
Garnish with mint or cilantro sprigs.

YUM


Friday, March 11, 2011

Buttercream Frosting (American Style)

In our country, Buttercream is, for the most part, at bakeries, not at all made with butter.  It's usually vegetable shortening.  Although that may be a bit more healthy, I can't condone buttercream frosting without butter in it, so I have gone back to the roots of the matter and come up with my own comprimise... You can find the palm shortening used in this recipe in your grocery's organic foods section.  It may be labeled vegetable shortening, just check the ingredients to confirm it's palm oil that's used to make it.
Other than that?  What can I say... when enjoying cupcakes for a special occasion, there's really no need to fuss around about things such as whether or not something is more healthy or not.   So just enjoy and move on!!

You have to make this the same day you intend to use it because of the butter and milk in it.  If you want to make it vegan then use vegan margarine and soymilk in place of butter and milk in the recipe... if you insist! :) It can be made in advance in that case.
Makes enough frosting for a dozen or more cupcakes.

1 cup palm shortening
1/2 cup unsweetened butter
5 cups organic powdered sugar sifted (5 cups measured before sifting)
1/4 cup milk
2 tbsp pure madagascar or bourbon vanilla extract


Mix the shortneing and butter in the bown of a stand mixer on high until smooth and fluffy.
Slowly add the powdered sugar with the mixer speed turned down low or you'll get it back in the face!
Then add the vanilla
Then add the milk last.
Scrape down and mix on high for about 15 minutes til your frosting is smooth and fluffy.  If it seems like it's not thick enough, go ahead and add more sifted powdered sugar and mix until smooth.
Voila!
Make sure your cake is completely cooled before frosting!

Vanilla Bean Cupcakes Recipe

Today I was testing out a recipe I plan to use for lemongrass cupcakes for my sister's bridal shower.  In order to share that recipe I have to first share the basic Vanilla Bean Cupcake recipe I use because from time to time I will share the unique ways I alter it to create interesting flavor profiles. 
So here is that recipe.  It is better than most typical white cake recipes.  The technique used in mixing the ingredients is also different and makes for a more moist and tender cupcake... a goal that is very difficult in cupcake baking because of the size of each cake.  I learned this technique from a book called Who You Callin' Cupcake, which, if you want to be able to make something different from your average cupcake, is the book to have.  Anyway, here is my version of their Vanilla Bean Cupcakes recipe.  Enjoy it as is, or use it as a base as instructed in some of my other cupcake recipes.

Makes 1 Dozen

1/2 cup organic sugar or organic cane juice
1 2/3 cups of organic all purpose unbleached flour
1 tsp baking powder
1 teaspoon salt
1/2 cup butter (unsalted)
1/2 cup skim milk
2 eggs
1 tablespoon of pure madagascar or bourbon vanilla extract
1 vanilla bean (run a knife down the length and split open then scrape the seeds out to be used for this recipe... you can put the scraped out hull in a container of sugar to make vanilla sugar)
 **if you don't have a vanilla bean just use 1 additional tablespoon of vanilla extract***

Preheat your oven to 350 and line your traditional size cupcake pan with cupcake liners.
In a stand mixer bowl, combine first four ingredients (dry stuff)
Add butter to the bowl and mix on low til a grainy meal is formed
Add 1/4 of the milk slowly til the mixture looks like a paste
In a separate bowl, combine eggs with remaining 1/4 cup of milk, vanillas.
Slowly pour the wet mixture into the stand mixer bowl til it is incorporated into the paste and forms a batter.
Scrape down the sides and mix on high for a few seconds until smooth.

Fill the cups in the pan to within about 1/2 inch from their top edges.
Bake for 10-20 minutes.  Tops will not be brown... but will be softly golden around the edges and a toothpick will come out clean when they are done.  They will also feel stable to the touch of your fingertip on their tops.

Cool completely before frosting! Voila!

Wednesday, March 9, 2011

The Pyrate's Soupe L'Ognion (French Onion Soup)

Yesterday the Pyrate made the BEST FRENCH ONION SOUP I HAVE EVER HAD!  I will never crave it again from elsewhere... not even that French bistro at the Grove promenade.  If you are a fan of French Onion Soup, you will fall in love all over again when you learn to make it at home from scratch.  It is truly a beautiful thing.
You'll need oven proof dishes, either porcelain, ceramic or stoneware individual crocks, ramekins, or bowls.  We used porcelain ramekins, which worked fine except they are a pain to get clean again... you have to soak them in baking soda and hot water overnight to get the baked-on brown stains off.  The picture below is not mine.  Just wanted to give you something to look at.  We forgot to take pics before we ate ours!  Ha!  Sorry!


This recipe was inspired by one we saw Alton Brown (the food scientist dude) make on the Food Network with some slight alterations because his ended up with not enough onions and even the entire recipe was a bit scant to truly feed 6 people like he said it would.  
Enjoy! 

7 large sweet onions (red or sweet maui or a combination of both as we did for ours)
4 tbsps butter
sea salt
1 cups of white wine (we used a chardonnay)
32 oz of beef broth (or vegetable if you prefer)
12 oz of chicken broth (or more vegetable if you prefer)
2 cups of apple cider
1 bouquet garni (thyme sprig, bay leaf, and parsley sprig tied together with kitchen twine)
1 loaf of country style bread
sea salt and fresh ground pepper
Cognac
2 cups of grated Gruyere


Cut onions in half then thinly cut into half-moon slices, mix together if using two kinds.  
Melt the butter in the bottom of a dutch oven or large soup pot over medium low heat. 
Spread a layer of onions over melted butter and sprinkle layer with a pinch of salt.
Repeat layering onions and sprinkling with a pinch of salt til all onions are layered in the pot.  Do not stir.
Leave to cook down over medium low heat for 15-20 minutes then stir. 
Continue cooking and occasionally stirring til onions are carmelized to a dark mahogany and reduced to about 2 cups.  This will take about 45 min. to an hour, and don't worry if it seems it's burning.
Add the wine and cook over high heat until liquid is reduced and is syrupy. (We had a chuckle-worthy moment when we got to this part because the Pyrate imitated Julia Childs as he sloshed the wine into the pot without a measuring cup. )
Add broths, cider, and herbs, turn down fire, cover, and simmer for 15-20 minutes.
Place oven rack on top notches of oven and heat your broiler.
Cut bread in rounds large enough to fit soup bowls.
Place the slices on a baking sheet and drizzle with a bit of olive oil.
Broil in the oven til nice and toasty, turn and repeat on the other side.
Season soup mixture with salt, pepper.
Add a splash of cognac. We used about 1/4 cup.
Remove herbs and ladle soup into crocks leaving one inch from the top.
Place bread round on top of soup and top with grated cheese.
Broil until cheese is bubbly and golden.
Be sure to watch it so that it doesn't burn.
YUM!!

Monday, March 15, 2010

Cook 'n Dine with Brig Feltus

What happens when you learn how capitalism has completely corrupted the way we eat in this country?  You buy less processed foods.  You stop feeding your kids fast food.  You start educating yourself, and you try to cook more.  You buy fresh produce and meats from the supermarket and prepare them yourself. 

Are you safe then?  Well, no, it seems the horrifying truth is no.  Even if you do these things you are exposing your body to foods riddled with pesticides, genetical engineering, chemical fertilizers, hormones, and antibiotics.  That's just for starters.  The horror story gets worse because beyond these very tangible and obvious crimes against humanity, we are purchasing meats that come from animals raised in the most atrociously unnatural conditions in the name of mass production and high yield.  Animals are being fed foods they would never normally eat because those foods are cheaper, and because those foods manipulate the animal's metabolism, making them grow faster... up to 3 times what they would have without any manipulation. 
Produce is plucked green and unripe before the sun has gifted it with the nutrients, color, and flavor, just so that it can survive its journeys to far away places where that produce may not be growing at that time of year.  It's often treated with chemical gases once arrived, so as to create artificial ripeness.  This is why fruit from a tree in your yard tastes so different from fruit bought at your local big chain supermarket.  
We eat this food without knowing... thinking if we cook fresh food, we're doing good by our families... not understanding the growth hormones given to animals is being ingested when we eat them and our children are reaching puberty at younger and younger ages because of it.... not understanding why when we buy fruit in the grocery store the flavor is so hit and miss.... not understanding that there is very little if any research to determine what the consequences are to eating genetically engineered foods.... meanwhile cancer, diabetes, autism, immune disorders, and hundreds of other ailments continue to plague us and we don't know how we get them.

I'm only so far talking about those of us who try to do good. I don't even want to get into what's in all the packaged foods and fast food we eat in this country.  Why the hell are we in such a hurry anyway?  Greed is killing us.  It's the other name for capitalism and convenience,  if you really think about it and it's killing us one bite at a time. 
I am always outraged at the way you can walk into a grocery store and there can be two seemingly identical items on a shelf, sometimes from the same corporate source, one says 'organic'  the other not.  The organic is always more expensive.  It's preposterous.  Why, after all should it cost more to get your food the old fashioned way, with less chemicals, less pesticides, less interference in general?  Shouldn't it be if we mess with it less, it would be cheaper?  Wouldn't it make sense that if the produce grew an hour drive away, it would cost less than the one imported from South America???  Well, unfortunately, the way our food system is set up, there's no way for organic to compete on a large scale.  So we reject it.  Throw our hands up and give in to the poison... We are literally drinking the koolaid and we don't even realize it. 
So what then?  What happens when you realize this?  Well, in my case, I had the opportunity to live in other countries where the food systems are not all about capitalism. 


They might be fascinated by our bright colors and shiny flashy labels, but back home in their countries they do things a little differently than we do.
When I was living in Germany 13 years ago, there was perhaps one or two supermarkets in the cities I lived in and they weren't very popular.  Why not?  They were not needed. They were really just a novelty you could find in the really big cities where there were a lot of Americanized amenities.  That's what they call it... Americanized.... Shameful...

But again, those stores were novelties, mostly marketed towards homesick expatriots living there or poor souls who somehow thought anything Americanized was cool. 
The average person didn't go there.  It wasn't not as convenient, as inexpensive, as fresh as what they could find right outside the door to their home...
Each little neighborhood... I'm talking about a couple of blocks square... had a butcher who got his meats from the farmer who raised it, somewhere within 30-50 miles on the outskirts of town, and he received it whole and cut it into the various cuts of meat himself on the premises and sold it within the same week... each had a produce stand (or two) where you could buy fresh fruits and vegetables grown nearby... yes, they still had bananas from south america and such, but the majority of the produce came from a farm close by... and if it was out of season, they didn't have it.... simple as that... I remember thinking to myself I must be tripping off of culture shock or something because I could have sworn that the vegetables tasted better and I didn't understand at the time why... each neighborhood had a bakery with fresh baked bread and such.... and if you wanted things like cereal or other packaged foods you'd go to a store that pretty much only sold that kind of stuff... even there, was no frosted flakes, cocoa puffs, cap'n crunch, or honey bunches of oats.... there were different sorts of whole grain cereals, oats, grits, wheat meal, muesli, and the occasional granola... there you could also buy your dairy products which came from a farm which was, again within 30-50 miles of the city you were in... Cheese could be bought there too, but you could get that fresher and better quality at the cheese monger in your neighborhood.  All of these would be within easily 5 minutes walking distance and everyone owned one of those rolling market baskets that fold up like an umbrella.  People didn't even often drive to get to these places. 

It was customary to buy only what you'd use in the next couple of days and that was fine because you knew that at any time, on your way in from work or school you could stop through and pick up fresh items.  
Foods didn't have to be advertised as organic because it was the law that they be that.  They didn't need not to be because the farmers could manage to keep up with their livestock... enough to supply just the butchers in their town, and not an entire country.  By the way the entire country is smaller than the state of texas...

Did you  know that in America there used to be several dozen suppliers of meat?  Now there are about a handful... yes, actually less than 5 major meat suppliers in the entire country!  Do you know what that means?  These companies have streamlined the raising, feeding, and production of meat in this country in such a way that they can cost effectively supply a country that is probably 50 times the size of Germany!!!   You can imagine the atrocities without actually seeing them with your own eyes. 


In countries abroad, the way they produce their food is more sensible, safer, less expensive, and truly, truly more convenient and NO ONE IS COMPLAINING!  Yes, logistically it means they eat less animal products than we do.  We eat too much animal products anyway... feeding the greed in us... But the truth should hurt!

 Here, you can buy a cut of meat and there is no regulation that says they have to tell you if it has been treated, for example as some ground meats with fillers are, with ammonia... or to inform you of whether or not the meat is from a cloned animal.  Or whether the 3 lb chicken you're buying has been fed animal waste products mixed in its meal and  is really 2 lbs and the rest is salt water injected into it to make it look more plump.... (by the way, they're selling it to you by the pound and you're paying for that pound of salt water... basically paying to be lied to... )  Our regulations are in reverse.  There are regulations for those claiming to be organic but none saying that non-organic food producers have to disclose anything... Okay, they disclose "ingredients" but nothing about the processing, nothing about the growth, nothing about the pesticides, hormones or antibiotics... because we would be outraged! 


So what now?  In my case, I am now slowly weening my family off of non-organic eating habits.  We are shopping farmer's markets for produce when we can and buy from the organic section in the supermarket.  We're eating less meat because it's expensive to buy free range, grass fed, hormone free, antibiotic free animal products.  We also shop at small bodega type markets which we know buy their fresh foods locally within our state.  
I cook more often.  I seldom eat at fast food places anymore except in an emergency, and I try to hit up one such as Chipotle which is a known practitioner of sustainable foodsWe are not religious about all of this.  But everytime I buy food, I am conscious now.  I am aware now.  I don't ever put anything in my mouth without understanding the consequences.  It is a matter of awareness. 

And this is how Cook 'n Dine with Brig Feltus was born.  I wanted to share what I'm learning with people who would listen.  We're making it fun by visiting farmer's markets, watching films, cooking together, and then dining together. 

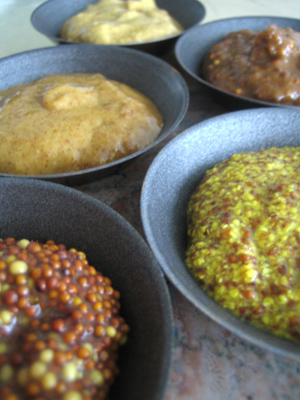
The first one was a great success, with a sold out attendance and raves afterward.  We went to a farmer's market, watched a film about farmers markets around the country, and then cooked a delicious Sunday Brunch style meal. 

This month, we'll be headed out early in the morning to a local organic farm that supplies fresh produce to high end restaurants and farmer's markets in Los Angeles county.   We'll be watching Food Inc.  and then cooking with the foods we bring back from the farm. 
If you are an Los Angeles local and any of this post inspires or moves you to make a change in your own life, please join us!  Let's learn together and spread this information to others that we love.  As corruption crumbles this obscene way of life all around us, just like in other living species, only the fittest will survive.  I don't intend to be among the feeble.  I intend to be among the strong, and  I'm starting with this small baby step and I hope you'll take it with me. 
Monthly sessions can be attended by signing up at brigfeltuscookndine@earthlink.net
You can also join our facebook group to stay in the loop regarding future events.
Co-Ed Cook 'n Dine with Brig Feltus group page on Facebook

Saturday, December 26, 2009

Projects for Giving: Edible Gifts Finale!


We've got a few of these already packed gift boxes left, if you're local and would like to grab some up... let me know.  I'll let them go for $15 per box. 


Boxes purchased at www.nashvillwraps.com


A small booklet with recipes and suggestions for how to use the items included in the gift box.
I guess, my first cookbook.  Perhaps someday a collector's item??


Graphics by Andreas Adamec, thread bound paper bag books by Scrapbook Supply Outlet on ebay


(tins and jars in this posting purchased from www.specialtybottle.com , recycled paper tissue, and recycled paper ribbon all purchased at www.nashvillewraps.com )


BeeBee's Gourmet  Honey Mustard with Sun-dried Tomatoes and Garlic


Christmas has passed now, and the new year is soon upon us!!  The Pyrate, the Austrian, and the Butterfly all wish you a happy New Year and all the best to you and yours!!!

Saturday, December 19, 2009

Projects for Giving: Ginger-Infused Honey (How To Make)


 A jarful of Ginger-Infused Honey makes a yummy gift!


This infused honey recipe is part of our holiday gift projects for this year.  We also made gourmet mustards and rosemary lemon sea salt.   Preparation for all three project can be found here


We ordered our honey from a bee farm here in California.  We found it online by googling "bulk organic honey".   You can find links to the shops we ordered from in the post for preparations linked above.
This is another simple project that doesn't require rocket science skills nor do you have to be a professional chef to make this gourmet quality goody that your friends and loved ones will totally appreciate.  It can be used to sweeten teas, mixed with hot water alone and drank as a tea, added as the sweetener in a pound cake recipe, eaten on toast, used as a glaze for roasted meats, added to morrocan sauce recipes, added to tomato sauce for a yummy bbq sauce.  It's great by the spoonful as a sore throat soother too!!!  We bought three 1 gallon buckets of honey for $60 total.  Enough to make thirty-two 12 ounce jars of infused honey.  We bought organically grown ginger at our local farmers market.   In total I spent about $120 including the ginger, the honey, and the jars.   That's about $3.75/jar of infused honey.  A jar of  non-organic, ginger honey in the Korean market costs around $7 for 8oz jar.  


Again, it couldn't be simpler!!!   Buy your honey.  Buy your fresh ginger root.  You'll need about 3 inches of root for every 12 oz of honey you intend to make.
Peel the ginger, cut it into 1/2 inch pieces and mix into your honey.  Close the jar and don't open again for at least 1 week before opening to use.  Store in the refrigerator up to1 month after opening.


Projects for Giving: Rosemary Lemon Sea Salt (How To Make)


So easy to make, Rosemary Lemon Salt 

This is part of our holiday gift project series.  This year's theme is edible gifts.  We made gourmet mustard, rosemary lemon sea salt,   and ginger-infused honey.   You can find the post on how to prepare in advance for these three projects here.


You cannot find a more simple project than making rosemary salt.  Try to make this extra special by getting organic ingredients whenever possible.  We got our salt from a spice merchant online, for a fraction of what it would have cost to buy organic sea salt in the store.  Our ingredients cost under $35 to make 18 pounds of this delicious seasoning that can be used a myriad of ways!   I paid about $20 for small metal tins with hinged lids to hold my little treasures.  It would cost more than $500 to purchase that much gourmet salt at retail prices.  My 18 pounds makes about thirty-six 8 oz tins.  A 4 oz tin of gourmet salt costs anywhere from $8 and more in specialty shops and gourmet stores.   The lemons came from the farmer's market and the rosemary... *smiles* we harvested from our very own garden, from a bush I planted 4 years ago.  So the rosemary cost us nothing!  All you need is 2 parts regular grain organic sea salt to 1 part course granule organic sea salt, for each cup of salt, add 1/4 cup of fresh rosemary leaves, and 3 tablespoons of fresh grated lemon zest.

In a food processor grind your rosemary into a fine meal, then mix together with lemon zest and salt.
Spread the mixture thinly onto cookie sheets and dry in the oven for 2 hours on 140 degrees fahrenheit.   The zest and the rosemary should crumble between your fingers if it is properly dried.  Store your salt in a cool place indefinitely.  However, it will be most flavorful if used within 6 months. 

Projects for Giving: Gourmet Mustard How To Make

 
Honey Mustard with Garlic and Sun-dried Tomatoes,  Beer and Honey Mustard with Tarragon and Orange Zest

THIS JUST IN:  Gourmet foods don't require expensive ingredients, nor do they have to be imported from some far away land.  You don't have to buy them in Gelson's, Bristol Farms, or Whole Foods.  You don't have to go to your city's version of Beverly Hills and pay exorbitant prices in pretentious boutiques.  From my perspective, quality gourmet foods are made using preparation and cooking techniques that are time-honored, often old world, and often handmade in smaller quantities than mass manufactured foods.   Usually they are made with ingredients acquired with special care and usually the ingredients are organic, straight from the source, when possible locally grown to the maker of the food.  Guess what that means?   You can make your own gourmet foods fresh, organic, more intensely flavored and tasting like the ingredients instead of the machines and chemicals used in mass preparations.    


In our house we made homemade gourmet mustard, rosemary lemon salt, and ginger-infused honey to give as presents this holiday season.   See my previous post regarding preparations for these items here


In this post, I'll explain how we made two delicious mustards that I can't get enough of!! 


I will post photos of the actual packaging at a later date, along with the pages from the recipe book that will be included with the gifts when we give them.   We made everything ourselves at home from scratch with organic ingredients purchased from their source when possible, none of the ingredients were purchased in retail stores except the beer and even that was from a microbrewery.  The mustard powder and whole mustard seeds were bought online from a spice merchant.  The vinegar came from a source online as well that promised its product was organic.   The honey came from a bee farm I found online as well.  Purchasing ingredients in this way, from the source and in bulk was a cost savings that will blow you away.   

I made fifty 8 oz jars of mustard, including all the ingredients for under $75, including the cost of the jars which were bought online from a specialty bottle company.   In actual hands on preparation time, I may have spent a total of 2 hours total to make the mustard, over the course of two days.  First soaking the seeds, then the next day grinding them and mixing in the other ingredients.  After that, it is simply the passage of time that makes the flavors in the mustard come together over the course of about 10 days.

This mustard can be used for many purposes.... on sandwiches, in marinades, salad dressings, and so many more things... You will find that a jar of this as a gift is appreciated in a way that something impersonal, bought in a store will never be.   The flavor is so much finer... such mustard would fetch more than $10 a jar in a fine gourmet shop.  Making this was a pleasure.  The experience of tasting it was fine.  Somehow finer than if we'd bought it in a store.  The aroma perfumed my house for a few days until the mustard was sealed in jars.   I can't wait for you to make your own.  You don't have to make enough for 50 jars.  A jar will only keep for about 1 month in your refrigerator so, make what you'll use and then give the rest away.
You can be creative with the ingredients as well.  This is a simple thing, not really a recipe at all.  You will simply use equal parts mustard flour (mustard powder) and whole yellow or brown mustard seeds.  You'll need to soak your mustard seeds in the liquid of choice for at least a day or two before combining with the other ingredients.  We used apple cider vinegar and beer to soak one batch, and white wine and apple cider vinegar for the other. 
For 8 oz of mustard you will need 3 tablespoons of mustard seeds, 3 tablespoons of mustard flour, 3/4 cup of combined liquid (beer, water, vinegar, wine...), and any additional ingredients you want to use to create the flavor you desire.  If you decide to add honey to your mixture, subtract 1/3 of the other liquid, but don't add the honey to the soaking phase of the process.  Add it at the end when you add all the other ingredients before grinding.
After soaking the seeds for two days in the liquid, we added the mustard powder, and the other ingredients.  We added dried organic tarragon, organic honey,  and fresh grated orange zest to the beer mustard.  We added fresh finely minced garlic, honey, and sun-dried tomatoes to the other.  I decided to make the beer tarragon mustard a bit smoother and the garlic sun-dried tomato one more course.  To do this we varied the amount of the mixture that we put through the food processor to grind it smooth.  For the course one we processed 1/2 of the mixture in the processor for 5 minutes.   For the smoother one we processed 3/4 of the mixture in the processor for 10 minutes.   With gourmet mustard you want a bit of  whole seed to be present.   You can see from the closeups above, the difference in texture between the course ground and the smoother.  The courser will be spicier.   
It will taste better with time, so don't worry if the flavor is a bit harsh when you first taste it. Once you've gotten the consistency you like, store your mustard away for about 10 days then check the flavor.  At this point, taste it to see if you want to add more salt, more honey, etc... then store your mustard in a sealed container in the refrigerator for up to a month.

Enjoy!!!

Thursday, December 10, 2009

Projects For Giving: Prep for Gourmet Mustard, Rosemary Salt, Ginger Honey Tea

Some of you have asked that I tell you what I'm doing for my holiday giving because you'd like to make along with us some of the things we'll be making.  So here's a brief summary of what we're doing.
I'm doing gourmet gift bags, filled with gourmet mustards, rosemary salt, Korean ginger honey tea, a recipe booklet, and other goodies to be determined... We'll be making around 50 of each item. Leftovers can be used by us, or given to people at other occasions such as a hostess gift when invited for dinner, or for no occasion at all, just to say "I love you!"
So we bought things in bulk.  Spices came from the Monterey Bay Spice Company.
We got our honey in 1 gallon containers from Miller's Honey.
You'll need jars.  I purchased my jars from the Specialty Bottle Co.  I used 8 oz jars for the mustard, 12 oz jars for the ginger honey tea, and I used 8 oz rectangular tins with clear hinged lids for the rosemary salt.

Then there's the packaging.  We've stopped using that cheesy, ink-laden holiday paper you can find in every drug store during this season, and opted for more eco friendly Andreas and I will make labels and tags for our items.  Some will be printed, some handwritten, on cardstock and attached with ribbon.  Other packaging will be recycled paper brown kraft wrapping paper, and recycled paper raffia ribbon that we got at Nashville Wraps.  This company carries a vast assortment of eco-friendly packaging and gift products.  I also get my reuseable green grocery bags here, 10 bags for about $6, and that's what i use instead of traditional gift bags. 

Everything you'll need (except for any fresh produce ingredients) can also be purchased in my Amazon Store.  Look for the section in my store that's titled Edible Giving.  I've set that up so that you can do one-stop shopping for everything you'll need.


Gourmet Mustard


Basically what we're doing is soaking mustard seeds for a day or so, then adding mustard paste made with the mustard powder (mustard flour) You'll get further instructions for this next week.  For now just collect your ingredients.
You will need to get some yellow or brown (depending on your preference) organic bulk mustard seeds and organic bulk mustard powder (mustard flour).
You'll also need to purchase whatever spices you want to add to it, and the day before you prepare this mustard, purchase whatever fresh herbs, horseradish, etc.  you'd like to mix in. 
If you want to make champagne mustard, you'll need to get some champagne vinegar.  Otherwise you'll need either cider vinegar, wine vinegar, or plain white vinegar.  About 1/4 cup for every cup of mustard you intend to have as end result.   If you want your mustard to be a brighter yellow you'll need a bit of turmeric as well.


Korean Ginger Honey Tea
You only need three things for this.  You need jars for however many you want to make, enough honey for however many jars you want to make, and the day before you're ready to make these, you'll need a generous amount of whole fresh ginger root.  Pretty darn simple.


Lemon Rosemary Salt


... if you thought things couldn't get any simpler, you'll need two things for this.   Lots of fresh organic rosemary, and sea salt.  You'll need both coarse and fine grain sea salts. 


That's pretty much it!!!
Check back in a few days when I've got all my ingredients ready and I'll have photos and instructions for how to make these gifts!

Monday, November 30, 2009

Sweet Potato Kahlua Swirl Cheesecake!


Sweet Potato Kahlua Swirl Cheesecake, all packed up and ready to go to 
Auntie Ruby's house for Thanksgiving Dinner.

Yes, there are quite a few pictures in this posting.  I couldn't help it.  I needed you to see this one from every angle, to see the surface, the sides, the crust up close, the interior goodness.   I don't know about you, but as far as I'm concerned these photos say more than I ever could...

I don't make this more than once or twice a year, for a special occasion... usually at Christmas or New Years, or, as is the case this time, for Thanksgiving Dinner.  Many years ago I used to make a cheesecake with pumpkin and kahlua.  This is a much different taste.  The squash-like flavor of pumpkin is not anywhere near as sweet or rich as sweet potato.  I played around with it until the sweetness and moisture balance was right and the following recipe is the result.
 

When it was time to serve up desserts, and our family partook in the first mouthful of this creamy rich pleasure, eyes closed, moans escaped, my name was called out.  It was good for me.   Ha!  I love a successful experiment.   The wedges of this cheesecake went so fast that I didn't get any.  I was happy that I'd made two....

...and that at the last minute, I'd decided to leave one at home.  Three days have past, and everyone who's passed through our doors has had a taste... and for now, this decadent treat, with its coffee liqueur infused swirls of cream cheese, the natural sweetness of sweet potato and vanilla, and its graham cracker-gingersnap cookie crust,  is all  but a memory.  You'll find this to be surprisingly not cloyingly sweet because the potatoes are allowed to carry that part of the flavor profile, with just enough sugar added to balance the chemistry.


There are two very basic things you'll need to know about making cheesecake.  You need a bain marie, and a 9 inch spring form pan.   A bain-marie is a french technique that loosely translates to mean a water bath.  Sometimes it's used to melt chocolate by setting the bowl of chocolate over a pot of hot water.  The other use, which you'll be doing here, is to place a pan of water on a rack in your oven below the rack your cheesecake will cook on.  The purpose of this is to maintain a moist environment in the oven so that the surface of your cheesecake will not dry out so much that it cracks.  Now, this is not a huge tragedy.  It will still taste the same if it cracks... well.... it might actually have a slightly less tender surface... but it will not ruin the cheesecake except for the esthetics, which in this case, I must say, is something worth preserving.  The cheesecake I decided to keep at home, was the first one I did, and I forgot to use a bain-marie, and there was an enormous crevice across the middle of it when I pulled it from the oven.  Again, not a tragedy, but not perfect.  The second cheesecake, as you can see had a much better appearance because I added the bain-marie to the oven.  
A springform pan is a pan made especially for baking cheesecakes and other types of breads and baked goods that are deep  and would be difficult to remove from the pan if the sides were not removeable.  A spring form pan has a base, and a removeable ring that clamps shut onto the base, then when your cake is done and you are ready to remove your cake, you simply release the clamp and voila!  The one I have is made by a german company called Oetker.   Amazon.com has one you can purchase here:


THE PLAYERS: (your grocery list)
Mashed Sweet Potatoes (Don't confuse these with yams. They have purplish burgundy skins and orange insides.  Anything else is NOT a sweet potato.  You'll need 2 cups of mashed sweet potatoes.  I don't list a number of these because it depends on how big your potatoes are.  Err on the side of having too much and save the extra to make sweet potato pancakes the next morning...Peel and cut them into large cubes to cook them faster in boiling water, then drain and mash and allow to cool completely before using.) Cream Cheese (For quicker preparation, get the whipped/spreadable cream cheese in tubs.  You'll need 24 ounces for one cheesecake) Graham Crackers (Find these in the cookie and cracker aisle.  You'll not use the entire box.  You'll need enough to make 1 cup  of  crumbs in a food processor.  Save the leftovers for s'mores..) Gingersnaps (Also in the cookie and cracker aisle.  You can find these in just about every American grocery store.  You can substitute another brand or similar ginger flavored crunchy cookie. You'll need enough to make 1 cup of  crumbs in a food processor.) Unsalted Butter (you'll need 1/4 cup for this recipe) Powdered Sugar (I try to make it a habit to buy organic, whenever possible but if you can't find it, conventional powdered or confectioner's sugar will do just fine for this purpose.  You'll need 1/4 cup for this recipe) Eggs (You'll need 6 eggs, go for organic and farm fresh if you can...) Vanilla Bean (You'll be using the inside of a vanilla bean in this recipe.  If you can't get one, then use 1 tablespoon of vanilla extract.   But I highly recommend using the bean...) Demerara Sugar (...or Turbinado Sugar... either will work.  You need 1 1/4 cup for this recipe. Regular granulated will work...) Ground Cinnamon, Ground Ginger, Whole Nutmeg (I buy this whole because it keeps its flavor better that way. You simply use a rasp to grate off as much as you'll need... 1/2 teaspoon for this recipe.) Kahlua Liqueur (Find this in any liqueur store or grocery with a liqueur department.  It's great for cold weather drinks by the fire.  A little in your coffee will warm things right up!  You'll need 1/2 cup for this recipe)
PREPARATION:
Cut your potatoes into large cubes, place in a large pot, add enough water to cover, boil rapidly until cubes are tender to the fork.  Drain, mash, and set aside to cool.
Preheat oven to 360 degrees.

In the large bowl of a food processor, add equal amounts of gingersnaps and graham crackers and pulverize until a grainy meal is formed.  There should be no large chunks. Make sure you have 2 cups of crumbs.

Mix in 1/4 cup of powdered sugar, and then 1/4 cup of unsalted butter.
Press this crumb, powdered sugar and butter mixture into the bottom of your springform pan, making sure to cover the entire bottom of pan, and pressing up the sides a bit. 
Gently put this crumb crust into the oven to bake for 5 minutes then remove and cool. 
While this is cooling make your filling.
Whip your cream cheese in a mixing bowl with an electric mixer until fluffy.
Add sugar and mix til combined. 
Scrape the inside of your vanilla bean into the bowl and mix until combined. 
Add eggs, one at a time with mixer going on medium speed.  Stopping to scrape down the sides of the mixing bowl with a spatula in between each egg.
Once all the eggs are combined with the cream cheese, transfer 1/2 of this mixture into a separate bowl and put aside.
Add 2 cups of mashed sweet potatoes, 1/2 cup of Kahlua liqueur, 1 teaspoon of cinnamon, 1/2 teaspoon of ground ginger, and 1/4 teaspoon of fresh grated nutmeg to the remaining half of your cream cheese egg mixture.  
Mix until combined.
You should now have a cream cheese filling and a sweet potato filling in two separate bowls. 
You will now pour 1/2 of your cream cheese filling into the bottom of your crust in the spring form pan.  
Then pour 1/2 of your sweet potato filling on top of that and spread around gently so as not to disturb the previous layer. 
Then pour the other 1/2 of the cream cheese filling in and spread around gently.
Then the final layer of sweet potato filling goes in last.  
With a butter knife, gently drag through and lift, swirl and pull through the filling  to create a swirl pattern, being careful not to disturb the crust.
Place a pan of water on the lowest rack in your oven.
Place your cheesecake in the oven and bake, undisturbed for 45 minutes.  
Turn off oven and open door just a crack. 
Leave cheesecake in oven to cool for at least one hour before disturbing.  
After one hour, remove from oven and transfer to refrigerator to chill completely. 
When ready to serve, gently slide a butter knife between the cheesecake and the inside of your springform pan to separate it.  
Then unlatch the clamp of the springform pan.
With a firm metal pancake turner or spatula, go along to bottom of the cheesecake to gently release it from the base of the pan, then carefully slide the cheesecake onto a plate, platter, cake pedestal, etc... 
Serve chilled. 


Monday, November 23, 2009

Sunday Farmer's Market Brunch for Ten... Part Two: Farmer's Market Quiche


 Potato Leek Gratin, Farmer's Market Quiche, Almondberry Tarte, Nectarine/Plum Pound Cake, Herb Infused Breakfast Meats.  Served on vintage, hand-painted, artistan signed plates from the Tonalo region of Mexico, 1940' s green Seneca Driftwood glasses, vintage Coorsite ball pitchers, crystal cake pedestals all from my collection.  All vintage wares come from my spelunking on ebay and in flea markets for a fraction of their worth. Shall I blog about my spelunking???(Ikea flutes bought on sale for less than $1 each... I have about 50 stored away for parties.)


This is the second of a five part blog mini-series about the brunch I hosted for my sister and her friends this past Sunday.   The other recipes will all be posted today as soon as I can get them each written.   Where you see the little book icons, you can scroll over the book and a window will pop up with additional info about ingredients or techniques or tools and such. 


My Farmer's Market Quiche is a great alternative to normal scrambled eggs.  Especially if you're like me... finicky about eggs.  I don't like them poached, runny, sunny side up, easy over, or anything like that.  I like them well beaten, well boiled, well cooked, and well seasoned.  This is a very simple recipe that can be pimped easily once you learn the basic structure of this thing called a Quiche... basically it's a savory egg tarte, made with beaten eggs, veggies, cheese, and if you want, meats, and all ingredients except for the crust and the eggs are optional and interchangeable.  If you do as I've always suggested and read through the entire recipe completely prior to even shopping for ingredients, you will be able to make this recipe happen in about 40 minutes, including baking. 


THE PLAYERS: (your grocery list)

The quantities listed are for one Quiche.  In my estimation, the perfect Quiche has certain variables always... a flaky flour pie crustYou can make your own, or, for time economy, like I did, just buy it in the grocery store.   The ones in the refrigerated section where you find those biscuits and croissants in a tube, ready to bake are much much better than the ones in the freezer section... Pilsbury makes a pie crust that comes in rolled circles without the pans.  I have my own pie and tarte dishes so, this is better for my purposes... about 8 farm fresh eggs(that's means what, class?  that's right! farmer's market!!!). I prefer large brown... As for the veggies I use 1/4 cup of diced ingredients from each of the following categories: and as for specific ingredients, it depends on my mood, and what I find in the farmer's market that week, and what flavor profile I want, mexican, french, italian, etc....  Some sort of diced onion, brown, red, green, shallot, leek, etc... for this particular recipe, I used Vidalia onions for their savory sweetness.   Some sort of peppers... green, red, yellow, sweet italian, pepperoncini, jalapeno, chipotle, etc... I used 1/2 red bellpepper and 1/2 yellow bellpepper per Quiche.  Some sort of herbs... thyme, oregano, basil, sage, etc... In this one I used fresh oregano, thyme, and rosemary to compliment the herbs I used in the other dishes for this meal.  Some sort of coarsely chopped greens... spinach, kale, bok choy, cilantro, etc... For this one I used sweet pea greens, which you may not find... use spinach if your farmer's market doesn't have them.   Some sort of semi-hard cheese... parmesan, aged gouda, romano, manchego, asiago, cheddar, etc... I used 1/2 cup of shredded Emmentaler cheese.  Optionally, you can also add 1/4 cup per Quiche... diced and previously sauteed meat of some sort... salmon, bacon, shrimp, ham, ground chicken, crab, lobster, turkey... pretty much any protein you like can work if paired with the right accompanying components above... I used 1/4 cup of diced and sauteed Canadian bacon for  two of our Quiches, and I left the third Quiche completely meat free.  That's everything I used for our Quiches on Sunday.  But you can add mushrooms, asparagus, marinated artichokes, broccoli, peas, to your sauteed veggies, and pretty much anything you like.  It's also a great way to use leftovers that aren't enough to make a whole new meal.  But for this particular time, just try it my way before  you try to experiment.


PREPARATION:
Preheat oven to 425 degrees if it's not already on from putting the potatoes in.

Dice your ingredients.  
Saute all of your vegetables (and meat) except for the greens in a pan with a tablespoon or two of olive oil, over medium high heat just until onions become transparent.
Prepare the pie crust.  Place it in pie tin or dish and create a scalloped or crimped edge. As you can see, from my photos, it doesn't have to be flawless to look beautiful.  The imperfection of your work will add a rustic look to the end result.  (and it won't make a darn bit of difference to the way it tastes!!)

Place your sauteed veggies (and diced meat) in the pie crust and spread to cover the bottom. 
Spread your fresh chopped greens over the top of that. 
Then your fresh herbs. 
Then 1/2 of your cheese. 
In a separate bowl, vigorously beat your eggs with a whisk until whites and yolks are completely combined
Add 1/4 cup of milk to the eggs and whisk again just until combined.
Pour egg mixture over the ingredients layered in your pie crust. 
Sprinkle the rest of the cheese on top.
Grind a bit of black pepper and sea salt over that. 
Bake in the oven for about 35 minutes, then check for doneness.  
Quiche should be golden on top and fluffy but firm, crust should be just golden.  Keep an eye on this, and if the crust looks like it's done but the egg part seems to not be done, use a strip of foil to to wrap around the crust edge to prevent it from burning.  
Serve hot or at room temperature.  


Related Posts with Thumbnails

So, Brig, what does your music sound like?


Email for bandsQuantcast